This article will show you how to change DPI Scaling Level for displays in Windows 10.
Dots per inch (DPI) is the physical measurement of the number of individual dots that can be placed in a line within the span of 1 inch. DPI setting controls the size of the text, apps and icons.
A lower DPI setting will make them appear smaller and a higher setting will make them appear bigger. By default Windows has setting of 96 DPI.
CHANGE DPI SCALING LEVEL FOR DISPLAYS REGISTRY SETTING
- Open Registry Editorby pressing Windows + R key combination, type in regedit and press Enter.
- If prompted by UAC, press Yesto continue.
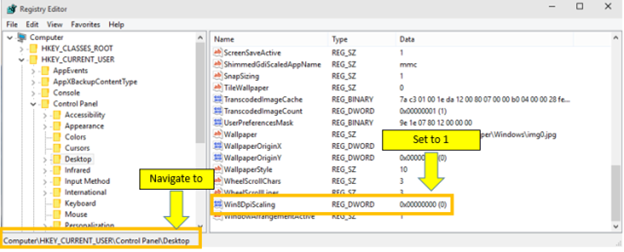
- Go to HKEY_CURRENT_USER\Control Panel\Desktop
- In right-side pane, look for a Win8DpiScalingand set the value to 1 and close Registry Editor.
- Restart your computer.

CHANGE DPI SCALING LEVEL FOR DISPLAYS IN SETTINGS APP
- Open Registry Editor and make the changes as described above.
- Open Settingsand click on the System
- Alternatively, right click on an empty area on your desktop and select Display.
- In System, settings screen click on Displayoption from left side.
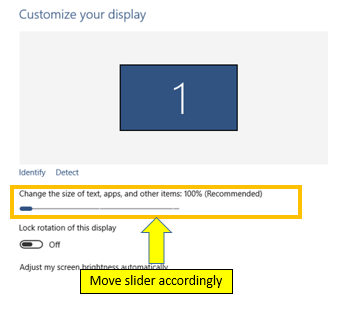
- Under Change the size of text, apps, and other items: 100% (Recommended), move the slider left or right to the DPI percentage you want to set for that display.

CHANGE DPI SCALING LEVEL FOR DISPLAYS IN CONTROL PANEL
- Open Registry Editor and make the changes as described above in first step.
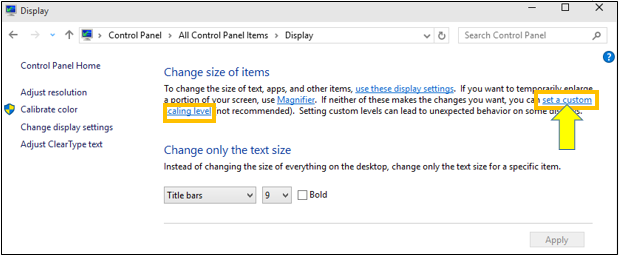
- Open the Control Panel (icons view)and select Display.
- Under Change size of items, click on the set a custom scaling level

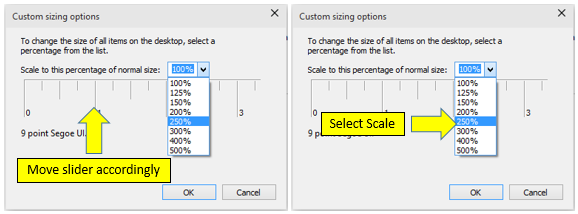
- Drag the ruler left or right to the scaling percentage you want.
- Alternatively, select the scaling percentage you want in the drop down menu.
- Click on Applyand then Sign out now.

Was this article helpful?
Tell us how we can improve it.