1) Insert a disc and the Roxio Burn Secure icon appears.
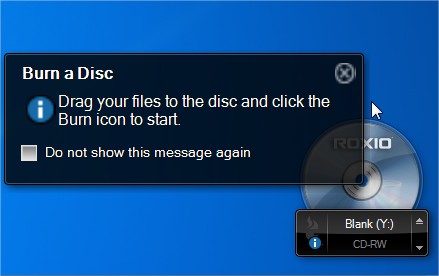
2) Click on the bottom right downward-pointing symbol to see the menu.
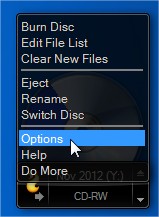
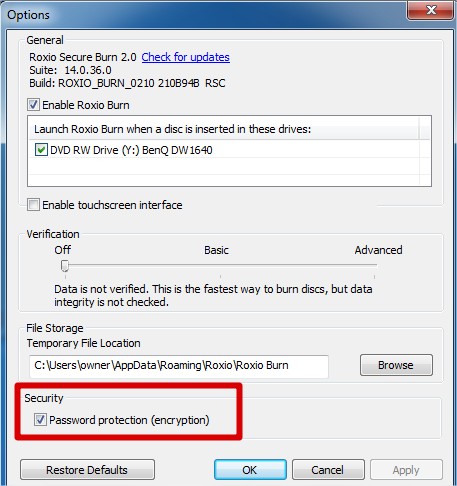
3) Click Options to see the options menu, and check the box for password protection, then click Apply.
4) Now use Windows Explorer to drag the desired files and drop them onto the Roxio Burn icon. If you want folders on the disc, build them up on your desktop first, and then drag them all to the Roxio Burn icon.
5) Click on the Burn Disc icon, give the application a password, and click on the Burn Disc button to finish.
Note that when you insert this disc into a drive the Roxioburnreader is autorun from the disc, and you are required to give the password.
Failure to give that means you are not allowed to see the hidden part of the disc which contains your files.
If your security system has disabled Autorun, your user will have to navigate the visible part of the disc and manually run the file RoxioBurn\RoxioBurnReader.EXEto enter the password and access the files.
Was this article helpful?
Tell us how we can improve it.