Creating a quick Oils study in Corel® Painter™
By Cher Threinen-Pendarvis
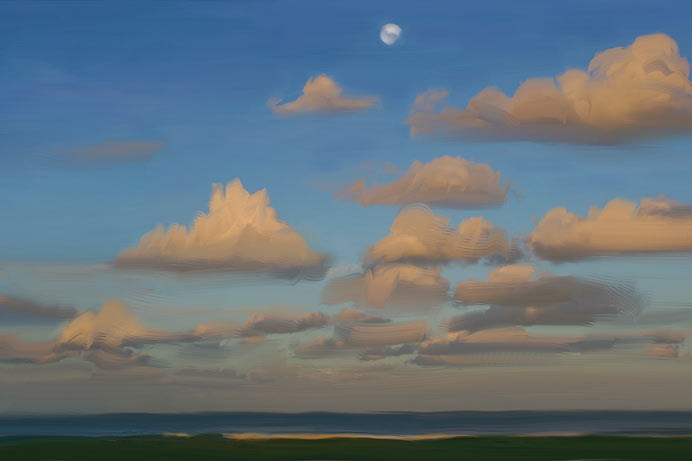
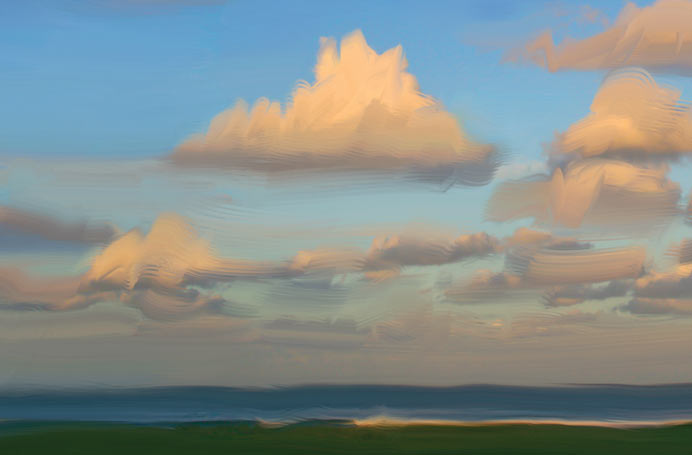
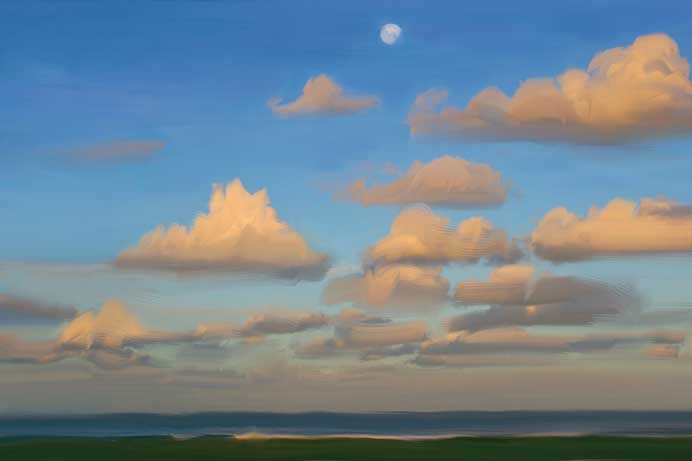
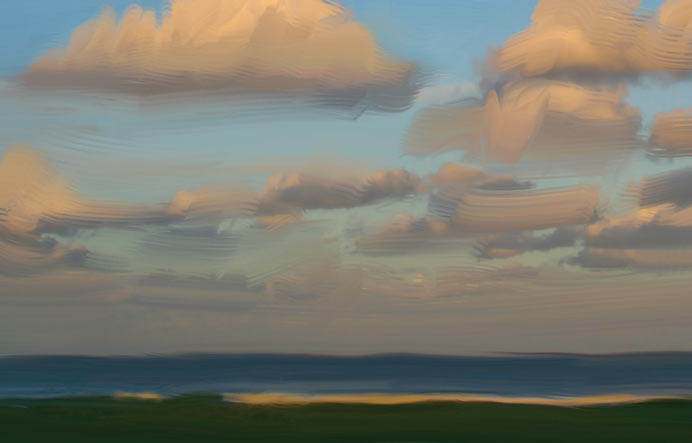
With the painting Moon Over Lennox, this project demonstrates loose, expressive brushwork on a simple landscape with an amazing sky. The Oils and Real Wet Oils in Painter can be used for both acrylic and oil looks. In this project we will use the Oils for laying in base colors and for modeling forms, the Blenders for smoothing and blending paint, and the Real Wet Oils for the final details and softening of a few areas.
1. Making a clone and simplifying.
You can paint from scratch or you can start with a photo, as we did for this project. Open Painter, choose File > Open and navigate to the photo you want to use. (The photo used here measures 2000 pixels wide. If your photo is much smaller or larger, you will need to adjust the suggested brush sizes.) Choose a photo with a colorful sky, preferably shot in the early morning or late afternoon. To preserve the original version, you'll perform this step on a clone copy. Choose File > Clone and save the clone using a descriptive name.
To simplify the photographic detail, this project uses the Smart Blur feature. Open the Under-Painting panel by choosing Window > Auto-Painting Panels > Under-Painting. In the Under-Painting panel, experiment with the Smart Blur slider, based on the level of detail that you want to keep. This image uses a small amount of Smart Blur (15%) because a bit of grain or noise aids in the painting process, many of the brushes can pick up a separate color in each brush hair, as you will experience in Step 2. Save the blurred file in Painter’s native format, RIFF.
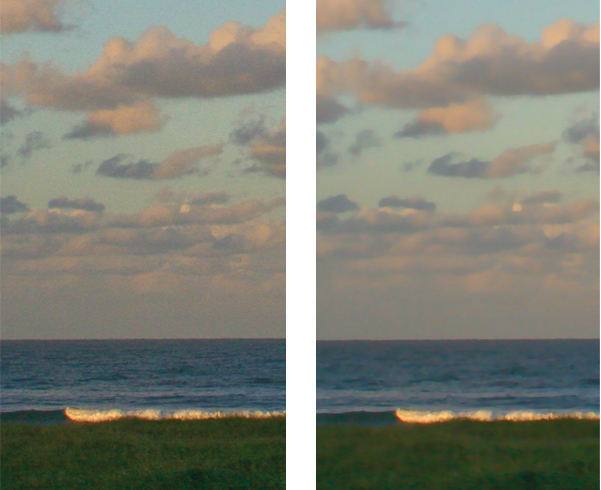
Caption: The photo, before Smart Blur is applied, shows more fine detail in the water (left); after application, the image has a smoother appearance (right).
2. Getting acquainted with the brushes.
The Oils brushes with RealBristle™ capabilities are unique bristle brushes that are sensitive to the pressure, tilt and bearing of the stylus, allowing very natural-looking brushstrokes. Varying the pressure and the angle of the brush causes the bristles to splay and twist, just like a conventional brush. In this brushstroke sample figure, the brushes that are demonstrated apply new, colored paint. Additionally, some brushes in the Blenders category (such as the Real Blender Flat and Real Blender Round), incorporate RealBristle features, which are useful for working over photos.
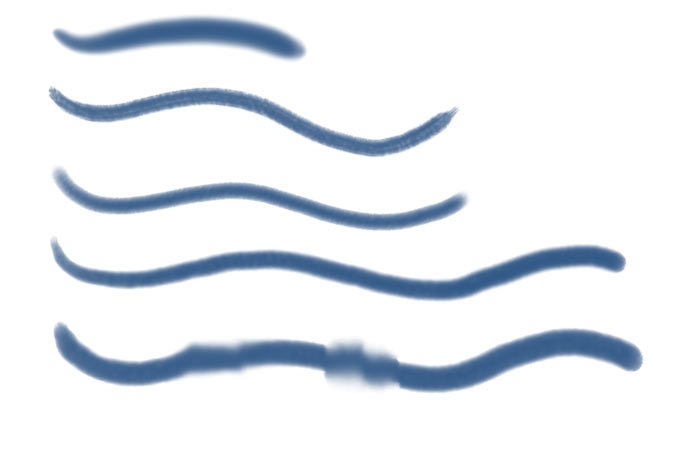
The second figure shows the Oils brushstrokes, with the bottom stroke smudged using the Real Blender Flat and Real Blender Round variants of Blenders. Most of the Blenders smear pixels without applying new color.
The third example shows brushstrokes painted with several Real Wet Oils variants, including the Liquid Oil, Wet Bristle, and Wet Oil. In this figure, the lower brushstroke is smudged with the Turp and Turp Grainy variants of Real Wet Oils.
Before you begin to try out these brushes, make sure to set up the Brush Tracking. For Windows, choose Edit > Preferences > Brush Tracking. For Mac, choose Corel Painter > Preferences > Brush Tracking, and make a brushstroke in the preview window.
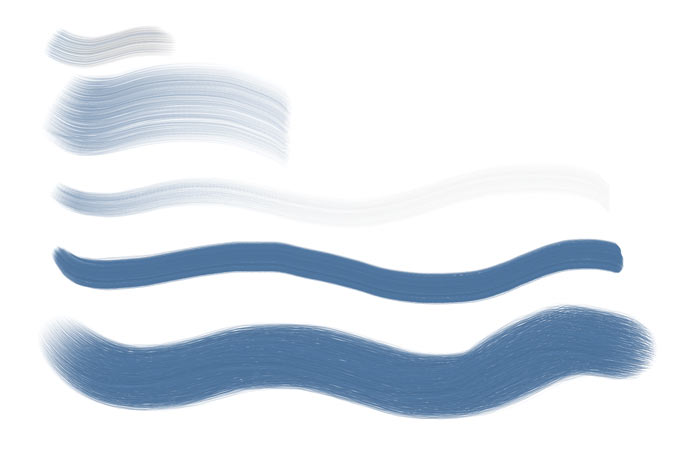
Caption: A sampling of Oils brushstrokes. From top to bottom: Real Fan Short, Real Fan Soft, Real Flat, Real Flat Opaque and Real Round.
Caption: A sampling of Real Wet Oils brushstrokes. From top to bottom: Liquid Oil, Wet Bristle and Wet Oil. The bottom stroke is smudged with the Turp and Turp Grainy.
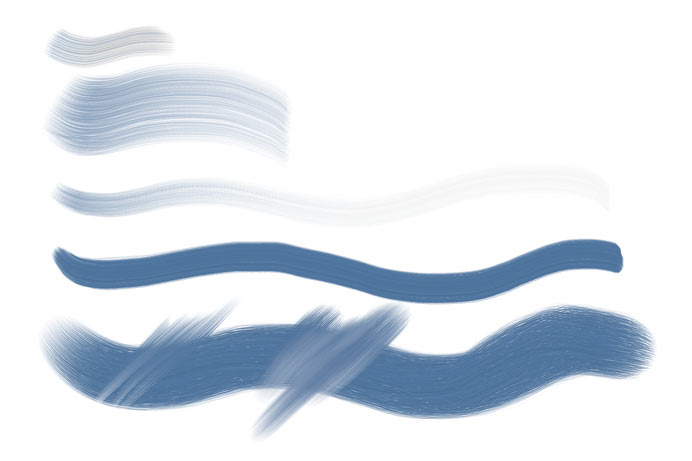
Caption: A sampling of Oils brushstrokes. From top to bottom: Real Fan Short, Real Fan Soft, Real Flat, Real Flat Opaque and Real Round. The bottom stroke is smudged with the Real Blender Flat and Real Blender Round.
3. Painting a loose understudy.
The first stage of the painting is the loose understudy, built by smearing the pixels on the photograph and loosely painting over the entire photographic image. In this project, painting is done on a copy of the Canvas layer. To put a copy of the Canvas on a layer, choose Select > All and then press the Alt/Option key and choose Select > Float. With the layer selected, turn on the Pick Up Underlying Color check box on the Layers panel.
Before you begin painting the clouds, study your photograph carefully. Which direction does the light shine from? Where are the highlights, midtones and shadows? In this photograph, the clouds are lit from above and slightly from the left side. The loose brushwork on the sky and clouds is painted using the Real Blender Flat variant of Blenders, varying the size of the brush while working over broad or fine areas. (Try 25–50 pixels.) If the size of your file is much smaller or larger, you'll want to proportionately adjust the sizes of your brushes in Steps 3–4.
To paint the shadow under a cloud, the stylus and brush are pulled horizontally to suggest the shadow. The repetition of horizontal strokes in the clouds also gives the sky a feeling of exciting, dynamic movement. If you want to add additional color, you can sample color from the image using the Dropper tool and mix it using the Mixer panel, or choose a color in the Color panel. Then apply the new color using the Real Oils Short, Real Flat or Real Round variants of Oils. The Real Oils Short is an ideal brush for blocking in large areas of color quickly.
Take another careful look at the highlights in your image and look for any suggestion of movement that will inspire the direction of your strokes. In this image, the midtone and highlight areas of the puffy cumulus clouds are painted using shorter, curved strokes to model the airy forms. When you are pleased with the understudy, save a new version of the file.
Caption: Analyzing the lighting in the photo with Smart Blur applied. The lighting comes from above and from the upper left.
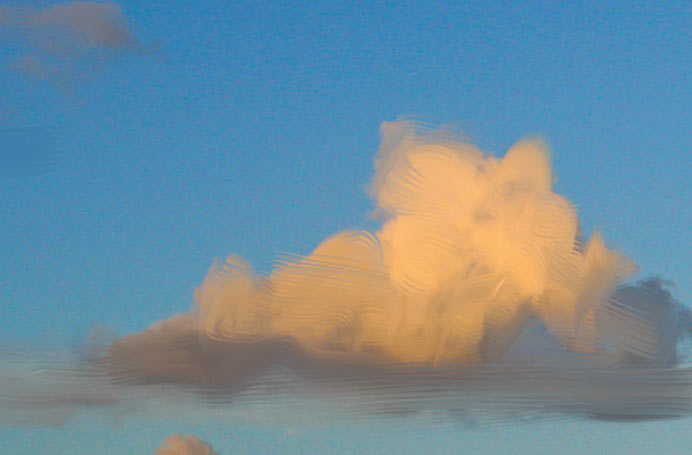
Caption: Using a large 50-pixel Real Blender Flat brush to smear the pixels on the cloud.
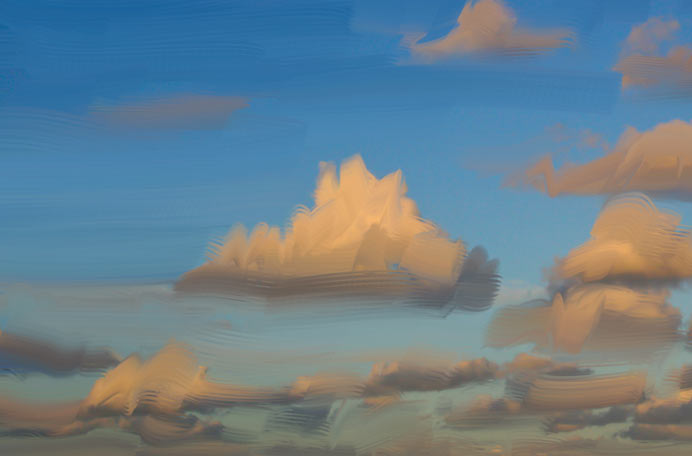
Caption: Building depth in the clouds by painting brushstrokes of various sizes with the Real Blender Flat and Real Blender Round variants of Blenders.
Caption: To achieve a feeling of movement in the sky, expressive horizontal strokes are used to suggest shadows on the clouds in the lower areas of the sky.
Caption: Painting short, horizontal strokes over the blue sky. The Enhanced Brush Ghost shows the size, tilt, bearing and rotation of the brush and stylus.

Caption: The highlights are painted with shorter curved strokes.
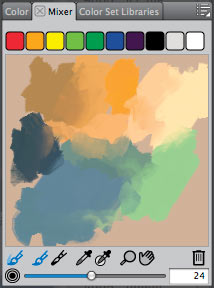
Caption: Colors sampled from the image, applied to the Mixer panel and blended to create color variations.
Caption: The completed loose understudy painted with various sizes of the Real Blender Flat and Real Blender Round brushes.
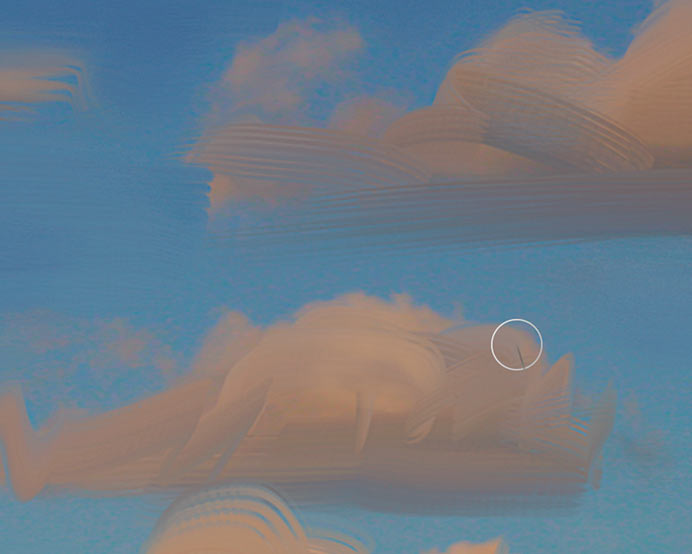
4. Finessing and refining while keeping it loose.
Now zoom into your image and look for the wilder, more random brushwork in the understudy. Where would your painting benefit from subtle finessing and touch-up? It’s important to keep a loose feeling with this project and not to make your painting too polished or rendered. The beauty of the brushes is that they paint so naturally. A few wild, expressive accents add character and excitement to your painting.
Next, add a new layer for the refined brushwork. Click the New Layer button on the Layers panel, and when the new layer appears, select the Pick Up Underlying Color check box. As you finesse the forms and brushwork, switch back and forth between the Real Blender Flat and Real Blender Round brushes, changing the size of the brushes as you work. For more dramatic thick-to-thin brushstrokes, try the Tapered Blender Round brush.
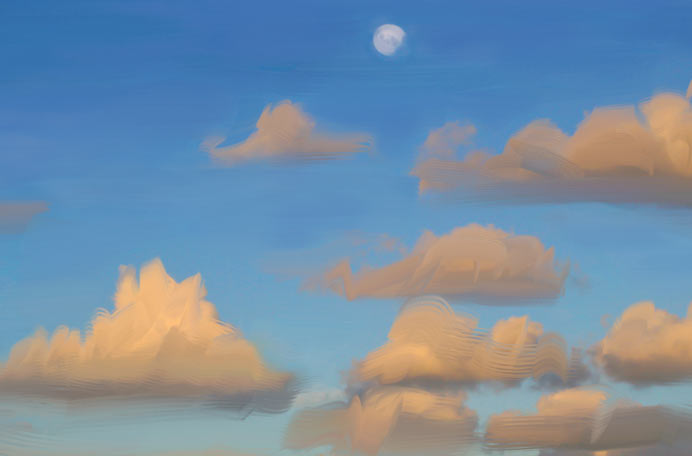
The details on the moon and highlights on the clouds are painted with small Real Round and Real Flat Opaque brushes (7-10 pixels). The Real Flat Opaque is an expressive brush that applies more opaque paint. A small Real Round brush (10–12 pixels) is used to paint brighter color on the breaking waves in the foreground. As details are finessed, brushwork is kept loose, and elements are suggested rather than rendered.
Next, try adding touches of new color sampled from another area of your image or from the Mixer panel, applying paint with the Real Flat or Real Round brushes. For interesting bristle textures, try the Real Fan Short or the Real Fan Soft brushes. For a tapered bristle brush that paints with a wet, oily feel, try the Real Tapered Bristle brush.
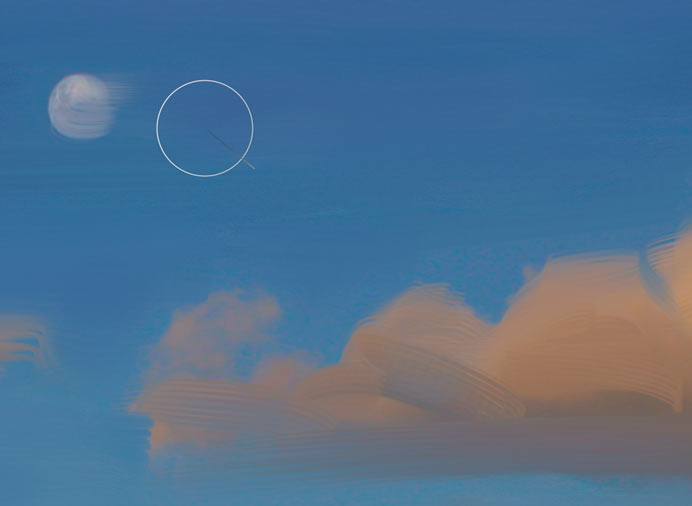
Now, choose the Liquid Oil variant of Real Wet Oil. With the Real Wet Oils, you can apply paint with a liquid feel and then push and pull pigment with blenders, for instance the Turp and Turp Grainy variants of Real Wet Oil. The Liquid Oil variant is used to apply brighter highlights to the moon and to the tops of a few of the clouds. To finish the painting, the Turp variant of Liquid Oil is used to soften edges of a few of the background clouds.
Caption: Adding more subtle detail to the clouds and sky while retaining the loose feeling.
Caption: Painting brighter color on the broken waves in the foreground and loose strokes under the clouds.
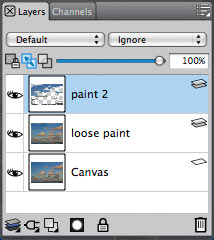
Caption: Layers panel: The Paint 2 layer is chosen and the Pick Up Underlying Color check box is turned on.
Caption: Using a small Tapered Blender Round brush to paint highlights on the moon and clouds.
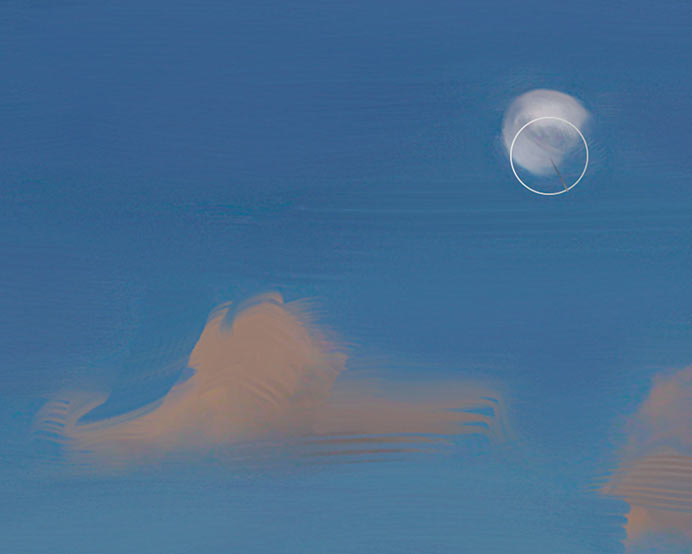
Caption: Applying brighter highlights to the moon using the Liquid Oil variant of Real Wet Oils.
Caption: Using the Turp variant of Real Wet Oils to soften and pull the edge of the cloud.
Was this article helpful?
Tell us how we can improve it.